Using Widgets to Make Easy to Manage, Complex Layouts in Magento
Here at Big Eye Deers we pride ourselves on our ability to design fantastic looking Magento ecommerce stores for our clients. We also take great care to make sure that the content is as easy to manage as possible which, with more complex layouts, can be easier said than done. After many years of experimenting with different approaches we think we’ve nailed the perfect balance between ease of use and edibility – all thanks to Magento widgets! Below, I’ll explain our process for breaking a design down into editable blocks.
Store owners aren’t developers
As developers it’s often easy to forget that the average Joe normally has little to no knowledge of HTML and CSS, this may seem obvious but I’ve seen far too many themes where the developer has clearly not thought about this. We try to stick to the following 2 rules:
- The user should not have to enter any HTML or CSS in order to maintain the layout of a content blocks
- The user should not have to copy and paste identifiers, urls or data from one area of the store to another
Sometimes this is possible by just extending the WYSIWYG editor in the Magento admin panel to include extra styles (on top of the standard paragraphs and headings etc…). However more complex areas require custom widgets.
Why widgets?
Widgets in Magento provide a user friendly interface for selecting and inserting some data and output it using a predefined template or templates. Magento ships with some useful widgets by default, however we often need to make our own to achieve more specific tasks. Widgets are great because they allow user to set some simple variables or select entities without having to worry about any markup.
Breaking a design down into Widgets
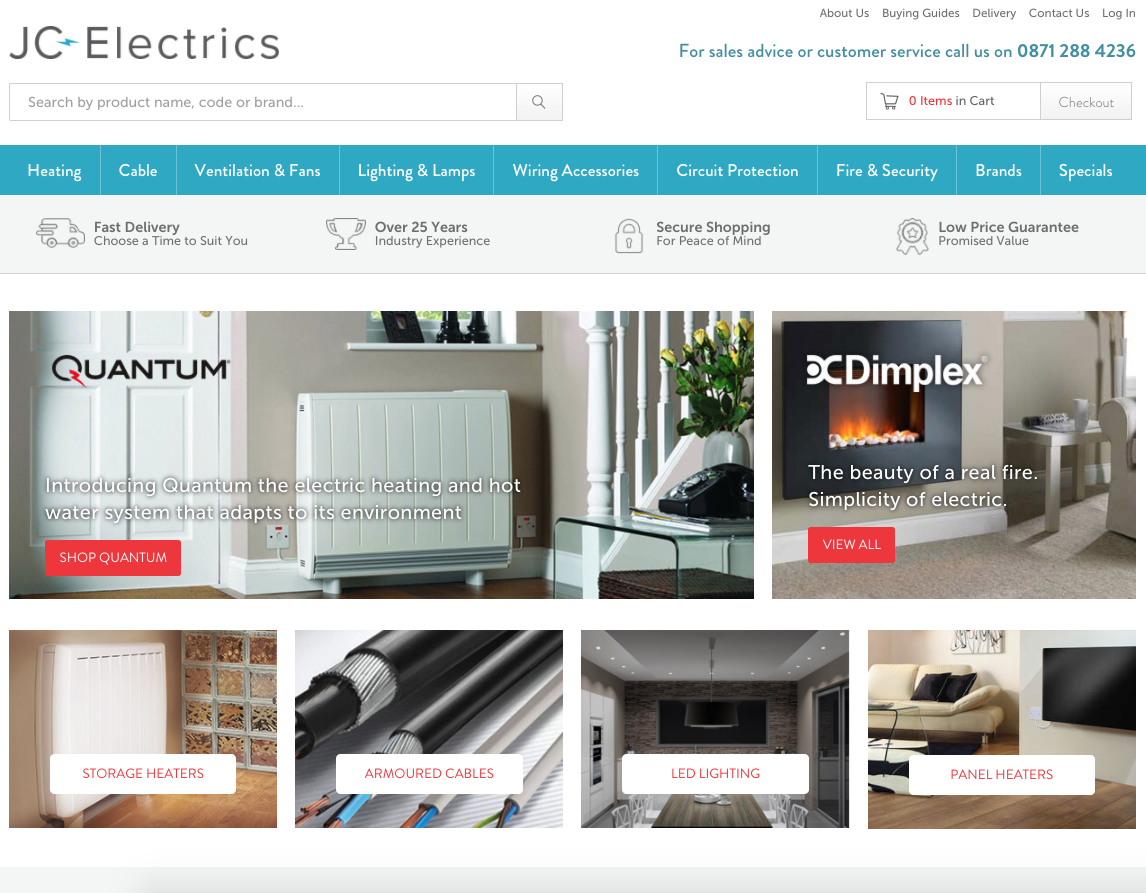
Let’s take JC Electrics’ homepage as an example. The main content area uses a nice grid layout with tiles displaying a mix of promotional content and promoted categories.
Identify distinct content areas
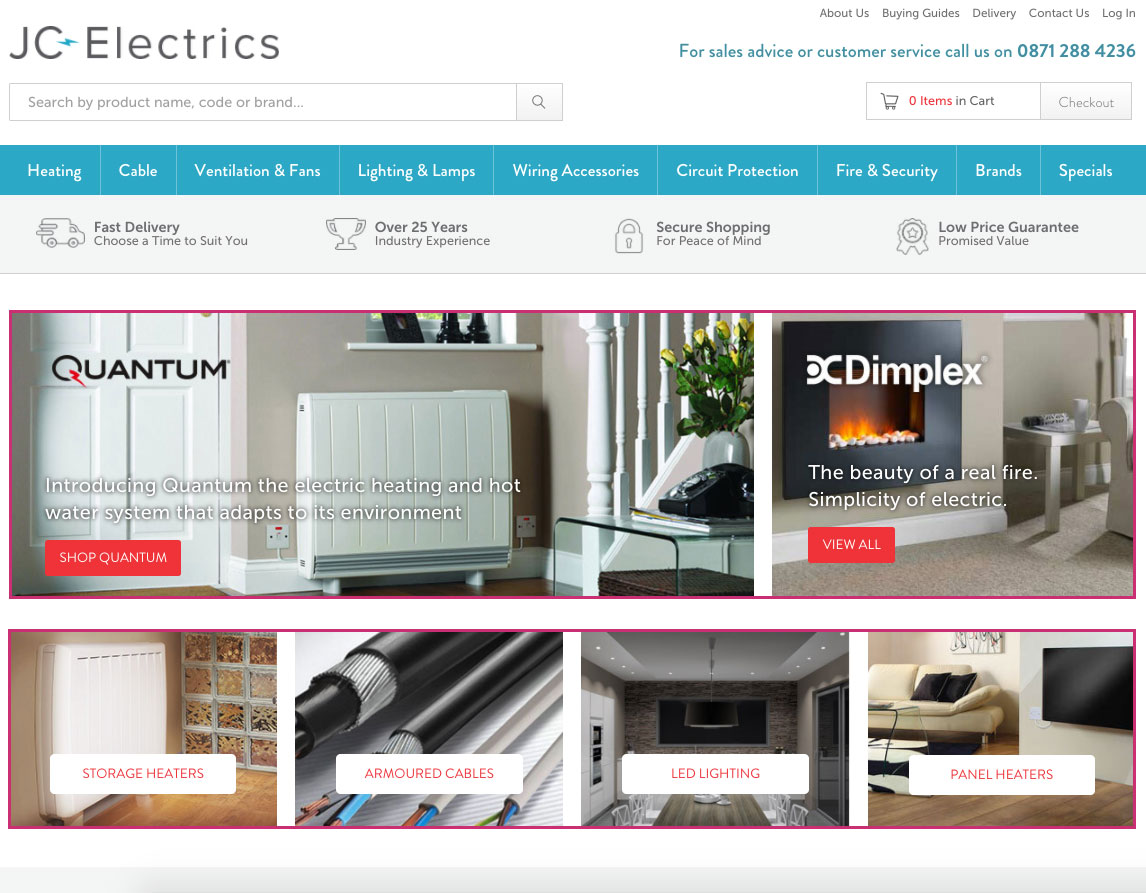
In this example we have 2 clear content types:
- Promotional content
- Promoted categories
Therefore it make sense to create 2 widgets.
Identify the data requirements for each widget
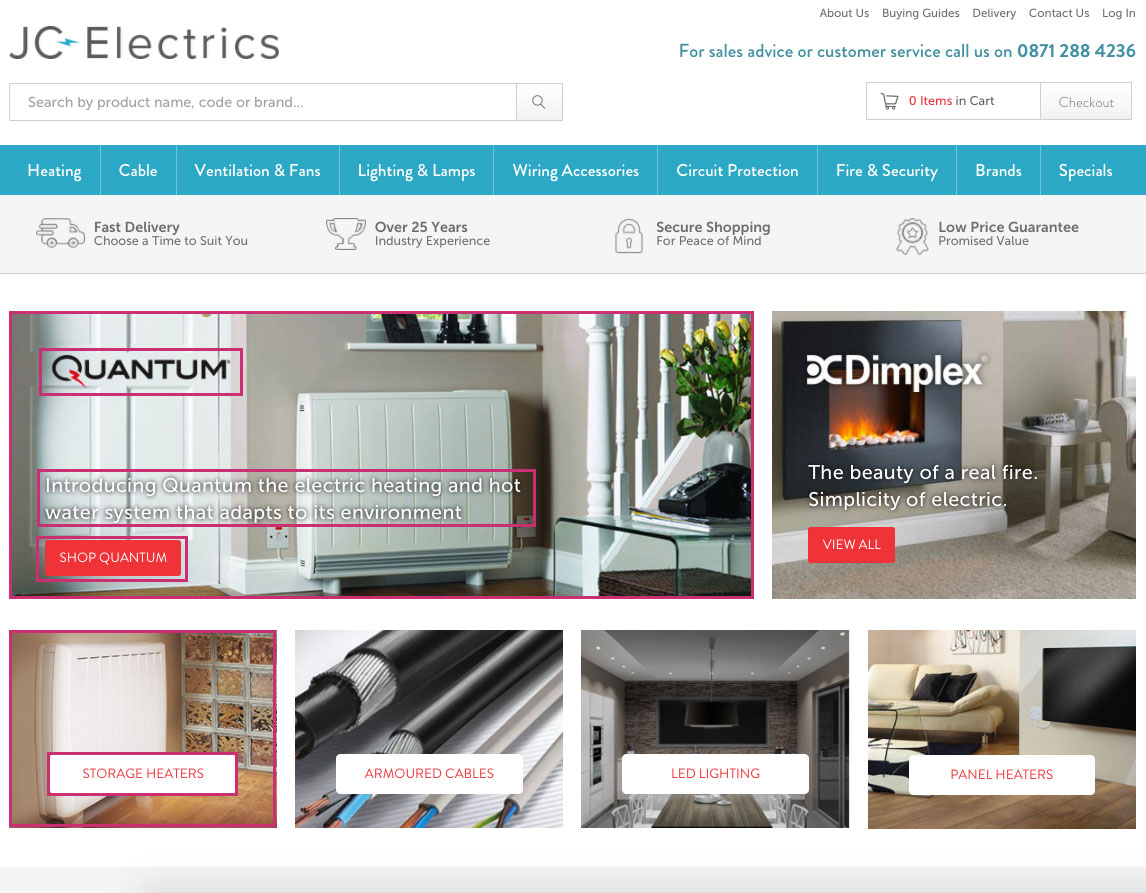
In each widget we need to identify all the areas that will be customisable. We then need to determine the best way for the user to enter the data.
In our 2 examples we would have:
Promotional Content Widget
- Widget size (small/wide)
- Background image
- Brand logo
- Tag line
- Button text
- Button link
As this widget is independent of any existing Magento entity such as Products, Categories or Customers, the best way for the user to enter data would be through a mixture of input boxes, dropdowns and file uploads.
Promoted Category
- Background image
- Button text
- Button link
Now, we could implement this in a similar way to the promotional content widget. However, this content is clearly related to Magento categories so why not make this even easier for the user and allow them to simply pick a category from a list. All of the other data (image, link, button text) can automatically be pulled from the category data already stored in Magento.
What next?
Time to build our widgets! I’ll save that for another article though…


Adobe Commerce (Magento)
Formerly known as Magento, Adobe Commerce is built for complex catalogues, integrations, and long term growth. We design and develop stable, scalable stores that support demanding eCommerce requirements, including multi-store setups, complex pricing, and Hyva based performance improvements.

Bespoke Build
We design and build custom eCommerce platforms for businesses with complex workflows, integrations, or non standard requirements. Built from scratch around your business needs using Laravel and modern architectures.
Working with brands across the UK from our offices in Cardiff and Exeter, you deal directly with a senior team of designers and developers specialising in Shopify, Magento, WordPress and bespoke eCommerce platforms.
We focus on commercial outcomes. Better conversion rates, strong SEO foundations and eCommerce platforms that continue to improve long after launch.